
Nested lists are commonly referred to as sub-lists, sub-bullets, or multilevel lists. As their name suggests, they're lists that are nested within another list and are typically used to mention more information about a particular list item. In many word processors and some website CMS, making a nested list is as easy as pressing the tab key on your keyboard (or pressing an indent button) when your cursor is on a list item. When working with the Webflow CMS, specifically with the Rich Tech Element, making nested lists is not as easy as you may expect it to be. Luckily there are workarounds, hacks, and custom code methodologies that can help you.
As of writing this, there is no official way to add nested lists (sub-lists, sub-bullets) via the Webflow Rich Text Element (RTE Element) from the Webflow CMS. However, there are solutions/workarounds available that range in difficulty from using a simple keyboard shortcut, through installing a hack that handles your list styling. These solutions/workarounds are listed in detail below. If you'd prefer official support for this, there is a Webflow Wishlist item already created for it that you can check on right here.
Method 1: Keyboard Shortcut Workaround (No Custom Code Required)
Like how nested lists work in Medium, Webflow also allows you to "nest" list items by maintaining the same indent from the previous list item.
To do this, simply press 'shift + enter' on your keyboard when your cursor is at the end of a list item, and the next list item will be indented. There won't be any bullet (or number), on the indented line, so I recommend you add a dash '-' character, followed by a space and then your content.
If you have more than one list item that you need nested, you can put your cursor at the end of your indented (or nested) list item and then press 'shift + enter' on your keyboard to make the next list item maintain the indent.
Example:
- This is an example bullet point
- And this is an example of an indented (nested) list item made using this method
Please note that this method only supports one nested list, you cannot have multiple nested lists within each other to create different levels/tiers.
Method 2: HTML via Custom Code Element
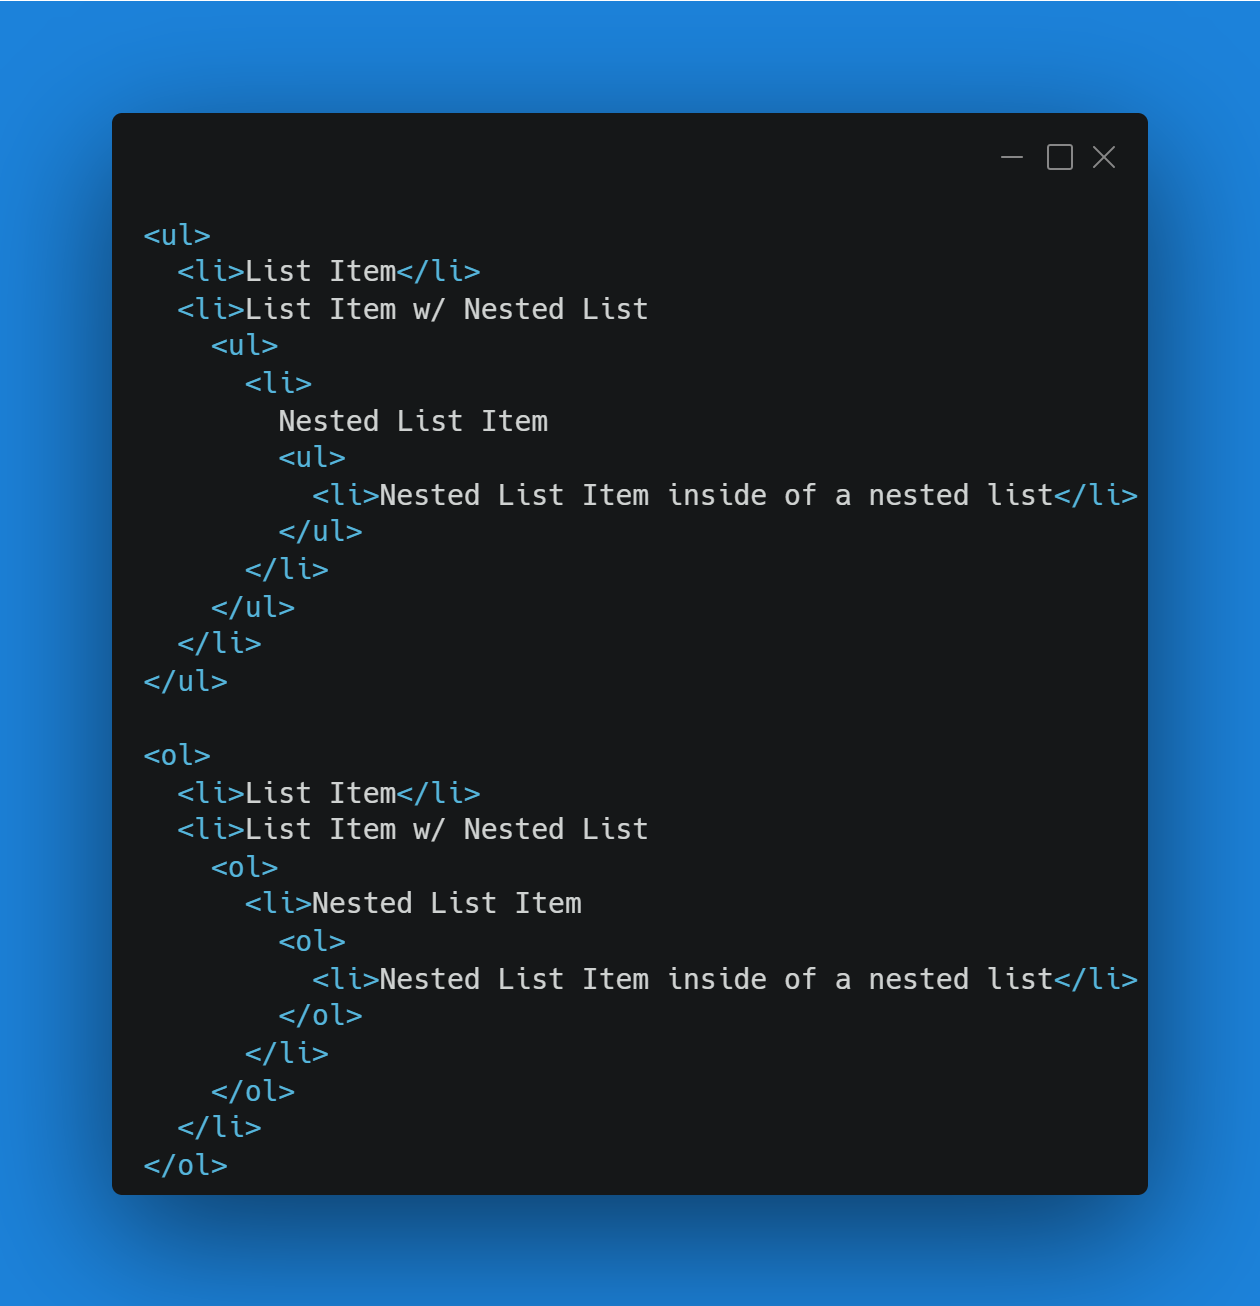
This method is the "official browser" way to handle nested lists as you'll be using HTML, a language that the browser understands and uses all the time. This method supports both nested lists and nested lists within nested lists, handy if you have a complex multi-tier list that you need to accommodate in your content.
Here's how you do it:
- When you're on a new line in the Webflow CMS, press on the "+" icon that appears followed by the "<>" symbol (see the photo below for reference)
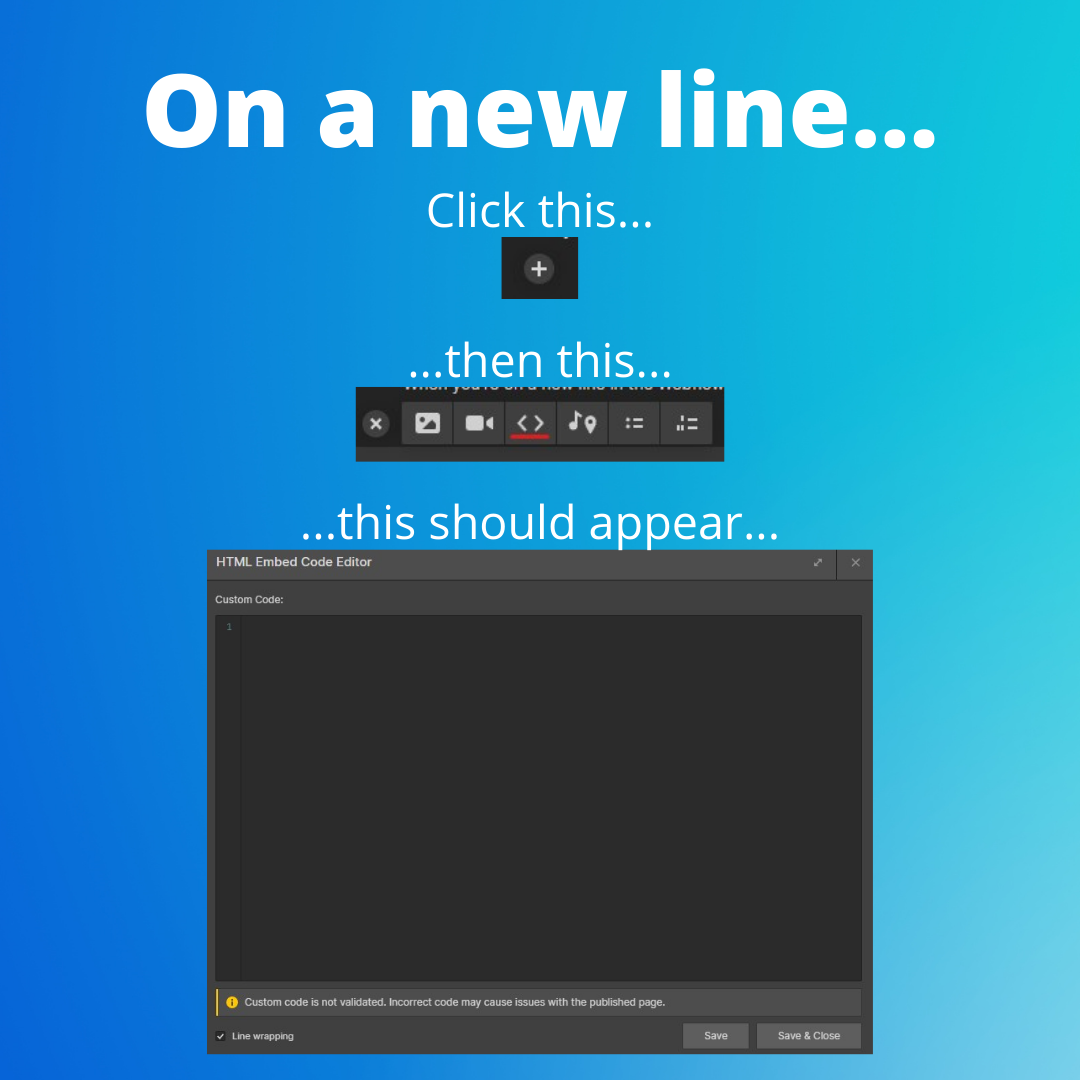
- Inside the window that appears, you'll need to type out your list in HTML. There's a fair bit that you can do in HTML to customize your lists, we'll cover the basic HTML tags you'll need to know below with examples to follow.
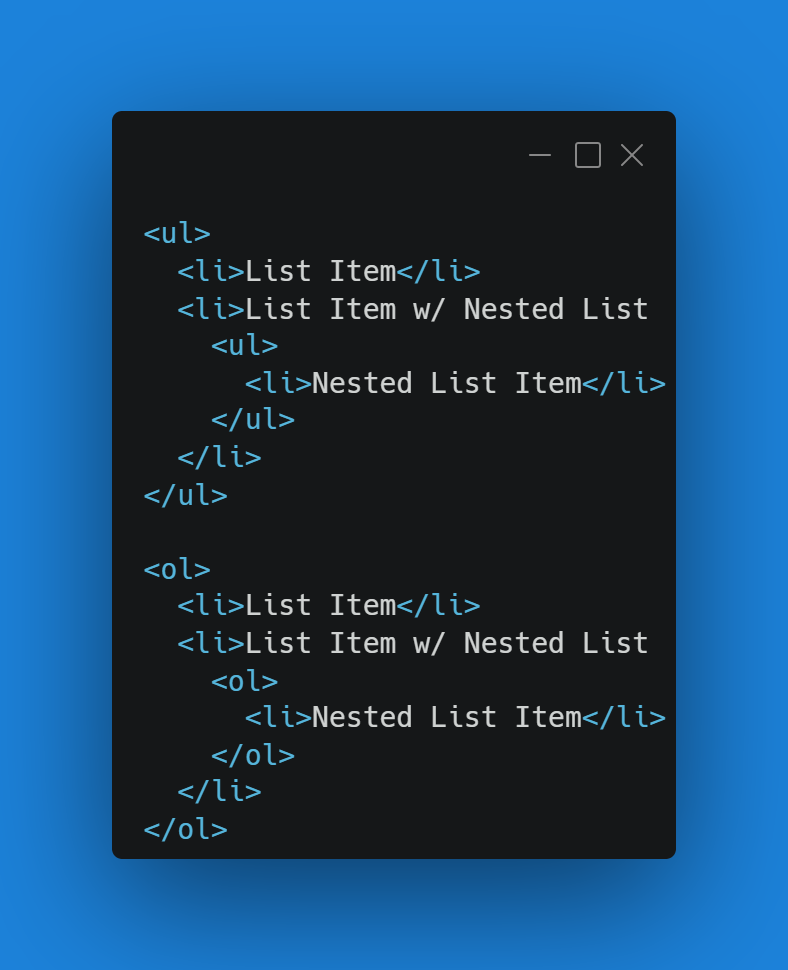
- <ul></ul> are HTML tags used to surround an unordered list (bullet points)
- <ol></ol> are HTML tags used to surround an ordered list (numbered points)
- <li></li> are HTML tags used to surround a list item - Please note: If you've never worked with HTML before and are confused so far, I'd suggest looking over some HTML list basics on W3schools.
- After you've typed in your lists, you can click the "Save & Close" button to return to the RTE editor in the CMS
- Please find two examples below of how to format your HTML for both ordered and unordered lists with nested lists and nested lists within nested lists.
Method 3: Finsweet Hack
The people over at Finsweet have created a hack to give you the option of nested lists using some custom code. This method supports both a sub-bullet (nested list) and a sub-bullet of a sub-bullet (nested list inside of another nested list). It uses some CSS and JavaScript to manipulate what you've typed into your Rich Text Element. They have a video and description on their website right here.
